

It was 2000 circa when Yahoo and Hotmail dominated the world of email services. But then, Google launched Gmail on April 1, 2004, and it came, it saw, and it conquered. Currently, Gmail is the best free email service provider undoubtedly, and with its wonderful features and add-ons, it has outclassed all its rivals.
I am sure, you must also be a Gmail user and you are reading this post for a purpose. Well, looks like you are an entrepreneur looking to create an email contact group to send one-click email to the huge number of audiences, right? Or you want to promote your blog or business through email? No matter what the cause is, you are always going to send the same email to multiple people, and for this, you will need a contact group or distribution list for sending emails at one click. But, how???
Well, along with a plethora of other useful features, one of the most important and fantastic features of Gmail is its contact group feature. What’s amazing about it? Well, Google Contacts allows you to make distribution lists and send emails to all of the desired contacts within a matter of some clicks.
In this post, we are going to show you how to create a contact group in Gmail, along with examples and screenshots.
Let’s start
Step by Step Guide to Create a Contact Group in Gmail
Log in to your Gmail account. Once you log in successfully, open a new tab and enter the following URL in address bar of the browser.
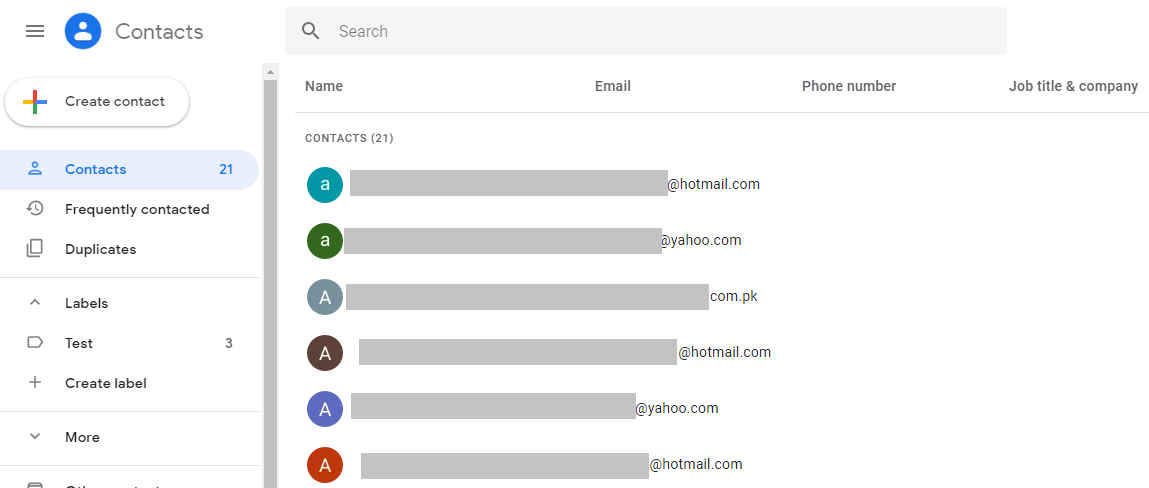
Your Gmail contact list will open on this page as shown in the given screenshot.
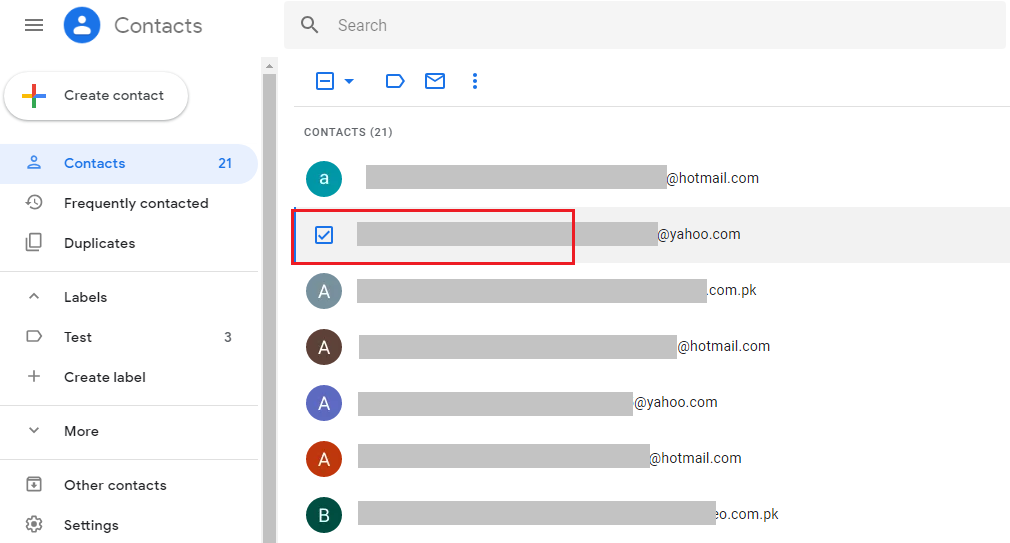
Now you have to select the desired contacts you want to add to this list. So, when you hover the cursor on contact, a checkbox will appear in place of the image or the first initial. Simply, click the checkbox to select that contact. You have to select all the contacts using the same method.
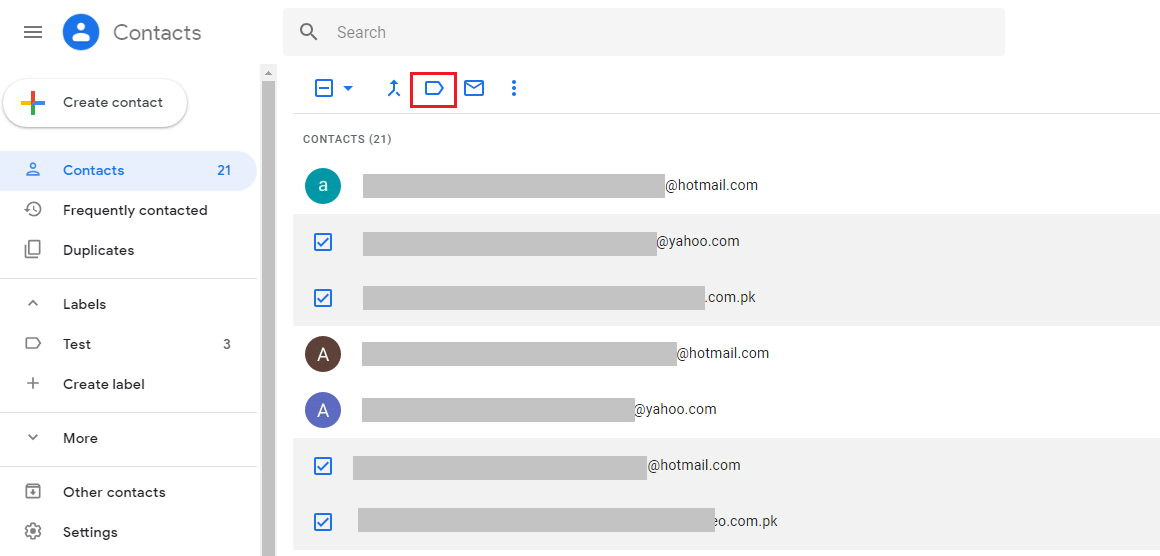
Once you have selected the desired contacts, click on the “labels” icon that is available right above the contacts.
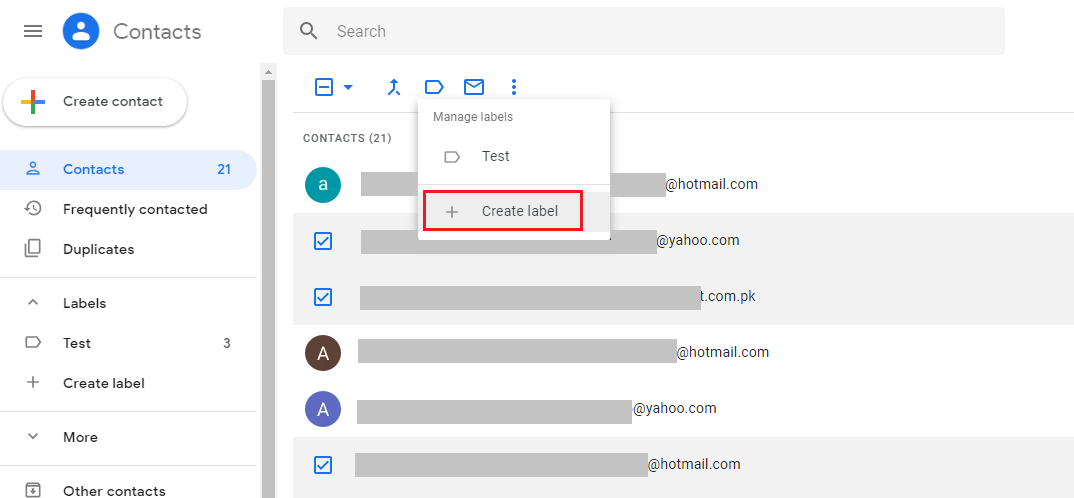
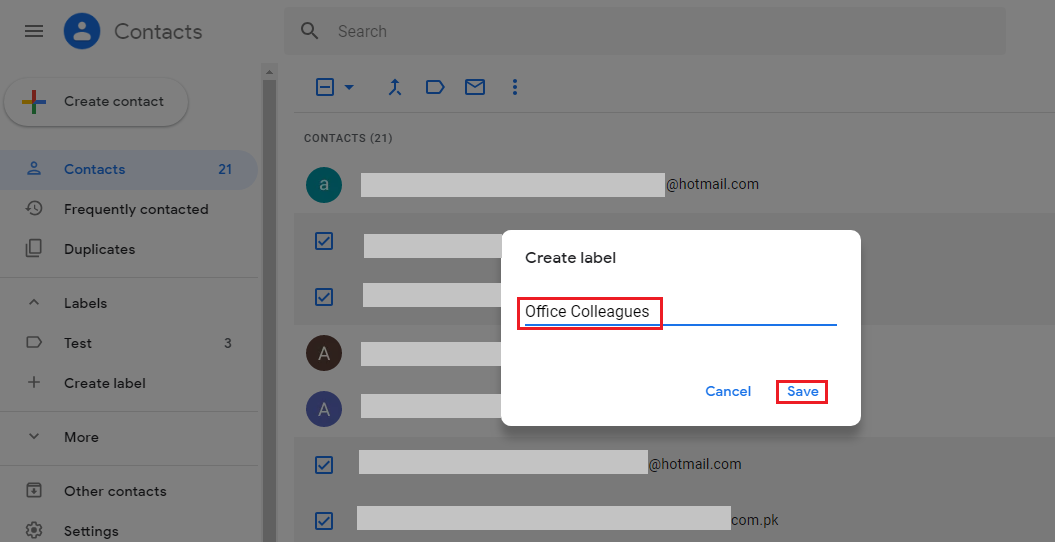
After you click the “labels” icon, the “Manage labels” drop-down menu will appear having the option “Create label”. Click on that.
After clicking “Create Label”, assign this contact list a name as per your convenience and click “Save”. In the given screenshot below, we have named it as “Office Colleagues”.
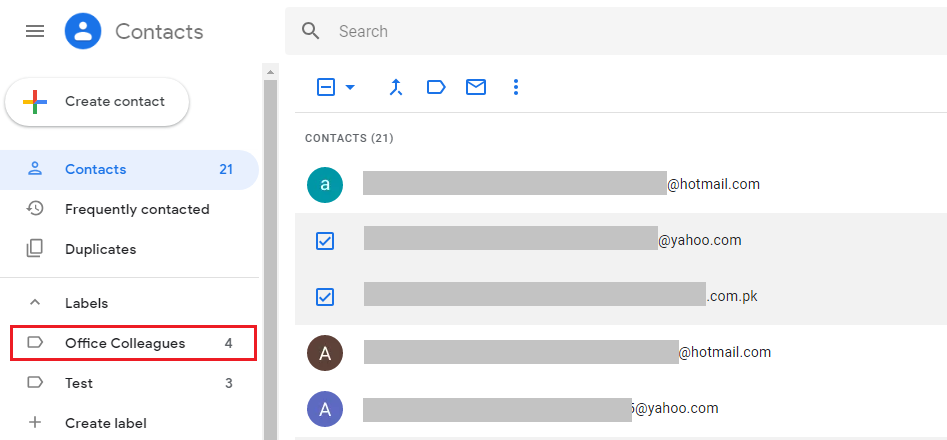
We are done with the contact list now. A new label named “Office Colleagues” is now visible at the sidebar. You should also confirm the creation of the new contact group label by looking into it.
Testing the Created Contact Group
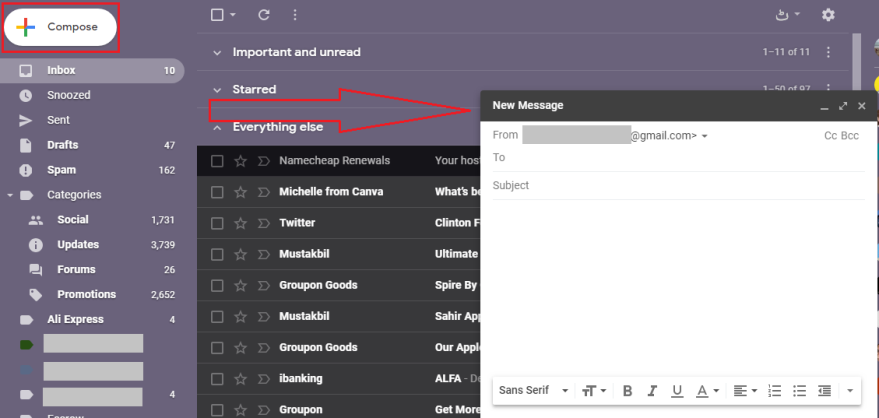
We’ll move to the second phase now where we’ll check the created contact list in our Gmail. For this;
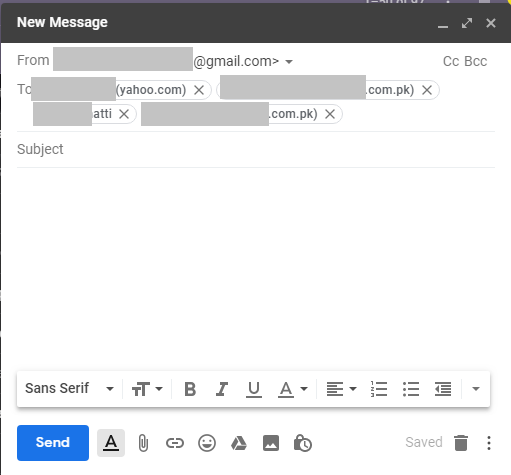
Open Gmail. Click on “Compose” in the sidebar, and the “New Message” popup will appear.
In the “To” field, type the contact list’s name. When you’ll write it, your contact list will appear below the “To” field.
In the screenshot have typed ‘office colleagues’ and the list appeared right below.
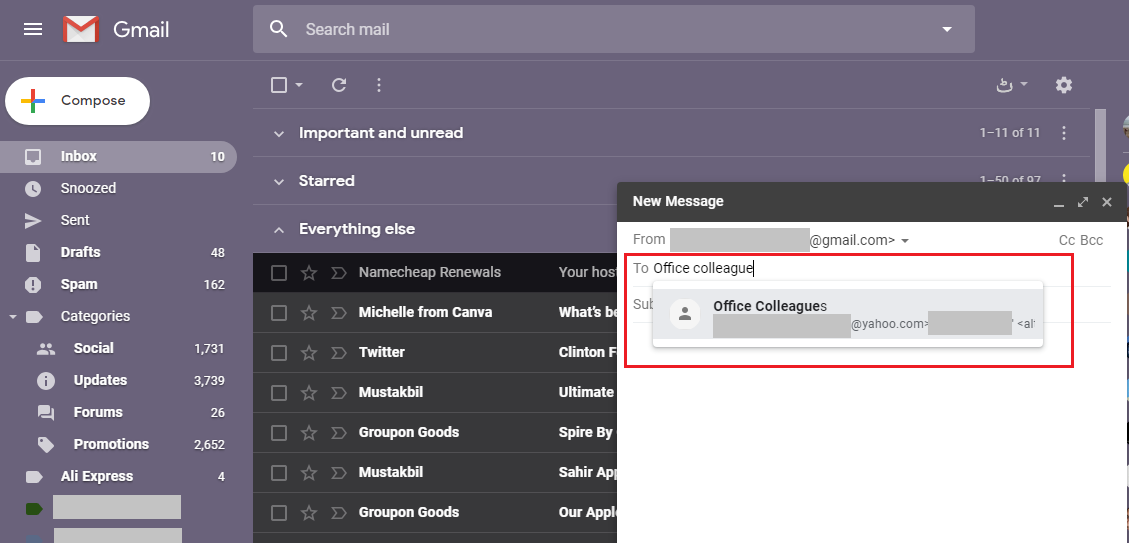
Simply click the appeared contact list and all the contacts in the list will be added in the “To” field. Now, you can put a subject, compose email and send this email to your contact group.
That’s all. You have successfully created a contact group in Gmail.
A Pro Tip: Hide Email Addresses of a Contact Group while Sending Group Mail
If you add the contact list in the “BCC” field instead of the “To” field, none of your contacts will be able to see other contacts in your list and every contact will assume that you have sent an email directly to them.