

Security is one of the most important concerns on the internet now, that’s why Google has introduced several security features for its users to keep their accounts secure.
Google 2-Step Verification is one of the most advanced and the safest security feature that makes the security of your Google account foolproof. In Google 2-Step Verification, you receive a text message on your registered mobile number that contains a 6-digit pin code during the sign in process, and you can log in to your mailbox only if you enter this 6-digit verification pin. That means no one can access your account, unless, they have your mobile.
However, you can disable the 2-step verification for every-time log into your preferred devices.
Interestingly, the confusion arises when you need to configure your Gmail account on the Outlook. You must be thinking it is impossible, but wait! It is possible and extremely easy.
Today, we are going to tell you how you can configure your Gmail account on Outlook in the presence of 2-Step Verification.
How does it Work?
Before starting a systematic tutorial, let us tell you how it works. Actually, Google offers dedicated password for other apps, and similarly, you can generate one for Outlook configuration purpose. Let us see how we can do it.
Before moving to the first step, log in to your Gmail account and open your Outlook. First, we will generate a new password for the account configuration on Outlook.
Step by Step Guide to Configure Gmail with 2-step Verification on Outlook
Password Setup on Gmail Account
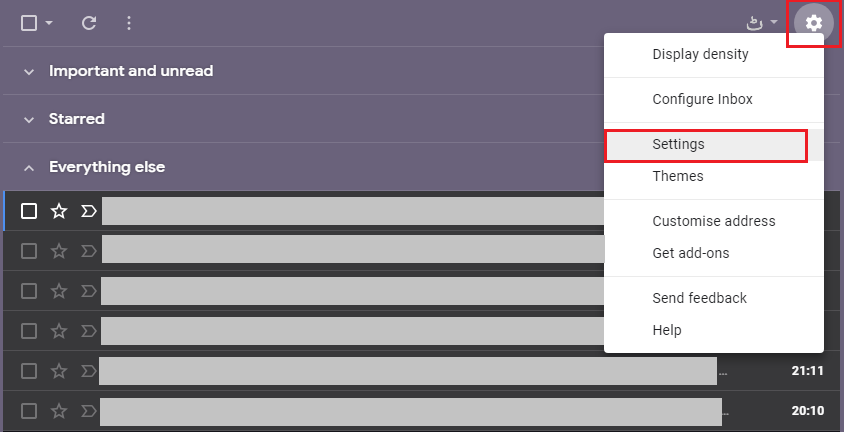
In your Gmail mailbox, click on the settings icon and then click on “Settings”.
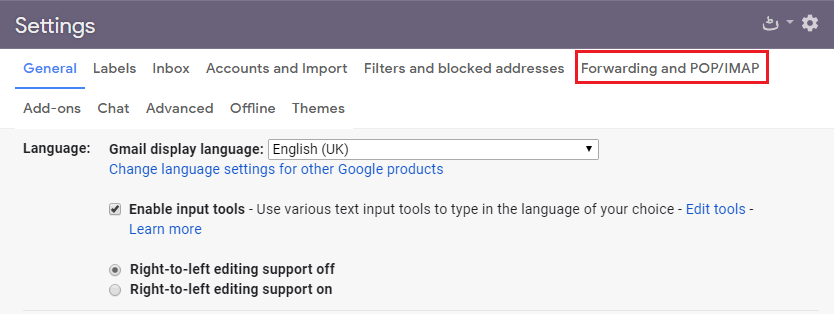
In settings, there are several options but you have to click on “Forwarding and POP/IMAP”.
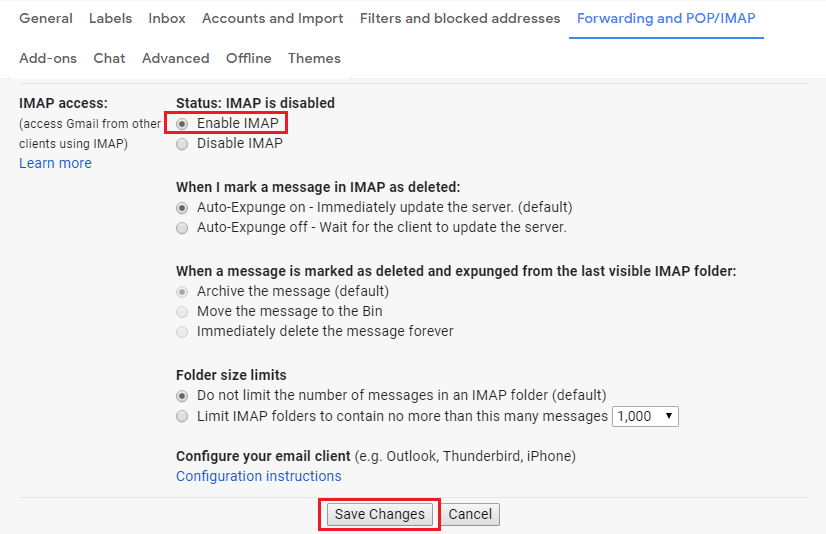
In Forwarding and POP/IMAP settings, scroll down to “IMAP access” and enable it. Do not click on any other option and save the changes.
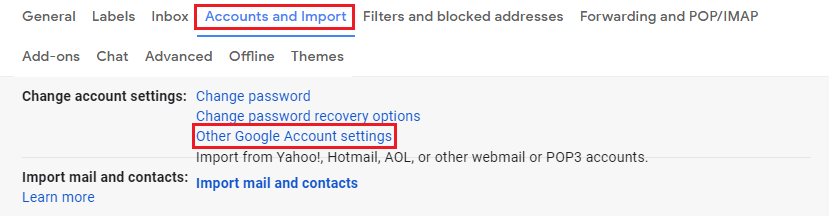
Again, click on the settings icon and select “Accounts and Import” then “Other Google Account Settings”.
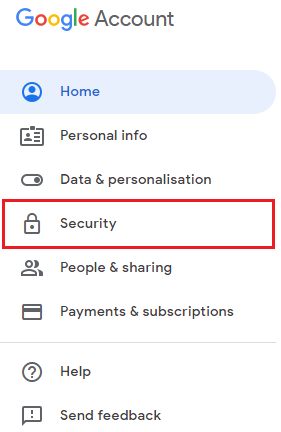
Google account page dialogue will open now. On Google Account page, click on Security from the sidebar
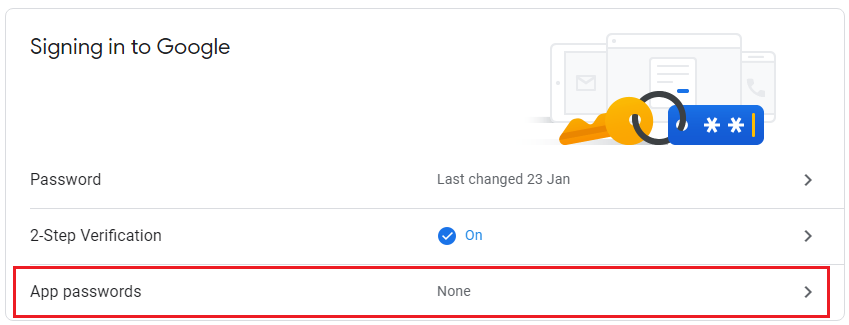
On the security page, click “App Password”. Here, Google may force you to re-enter your account password as a security check, confirm your password.
Remember, you may be asked for password verification more than once while changing/activating any security-related settings.
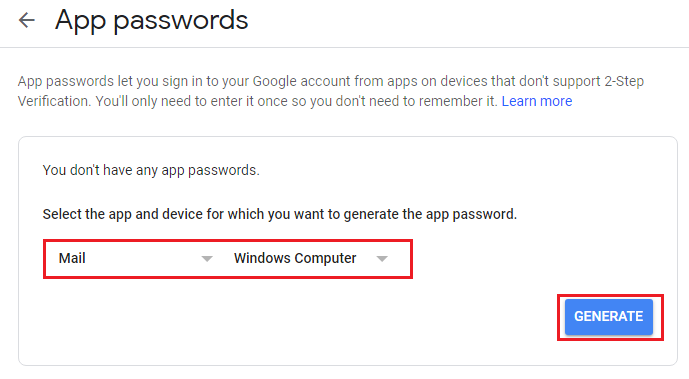
On this page, select “Mail” as your app and “Windows Computer” as your device, and click generate. You may be asked to confirm your actual Google Account password, so you should do it to proceed further.
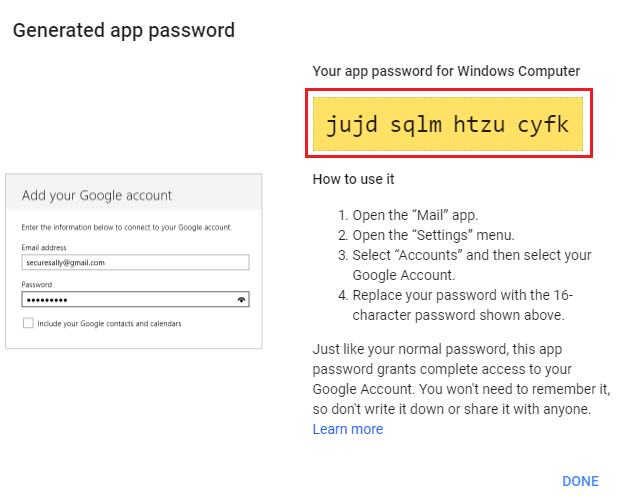
Now, you’ll be provided with an app password for your Windows computer.
We have done with the Gmail part. Now we will move to Outlook and configure our account.
Account Configuration in Outlook
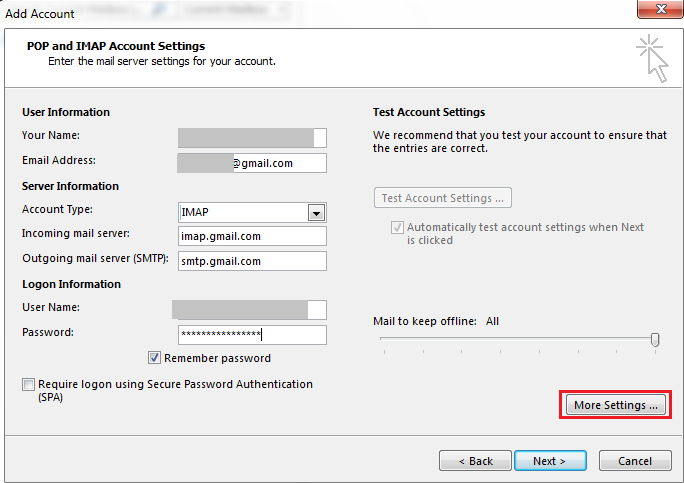
Open the account settings on Outlook and add a new account. Use the following credentials when configuring the Gmail account in Outlook.
Your Name: Your name
Email: Your Gmail Email ID
Account Type: IMAP
Incoming Mail Server: imap.gmail.com
Outgoing Mail Server: pop.gmail.com
Username: Your Gmail handle (Without “@gmail.com”)
Password: The app password generated through Google Security settings.
After entering all the credentials, click on the “More Settings” button.
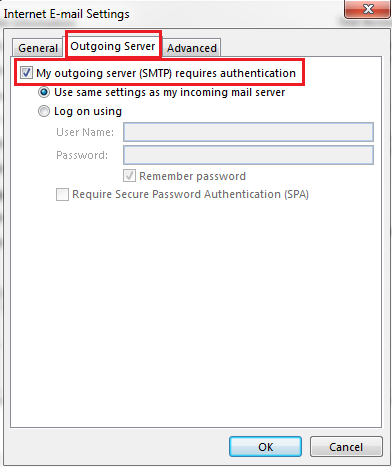
From the menu, first, click on “Outgoing Server” and checkbox “My outgoing server (SMTP) requires authentication” to select it.
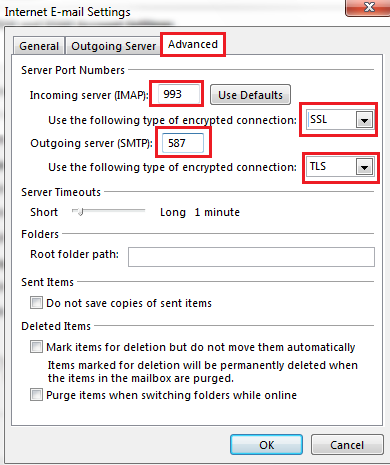
Now click on advanced and select the settings as shown in the screenshot below, and click “Ok” to complete the settings.
Click next, and you will be directed to “Test Account Settings”. Now, you’ll receive a successful test complete message.
Click Close> Finish, and start sending and receiving your Gmail emails on your Outlook
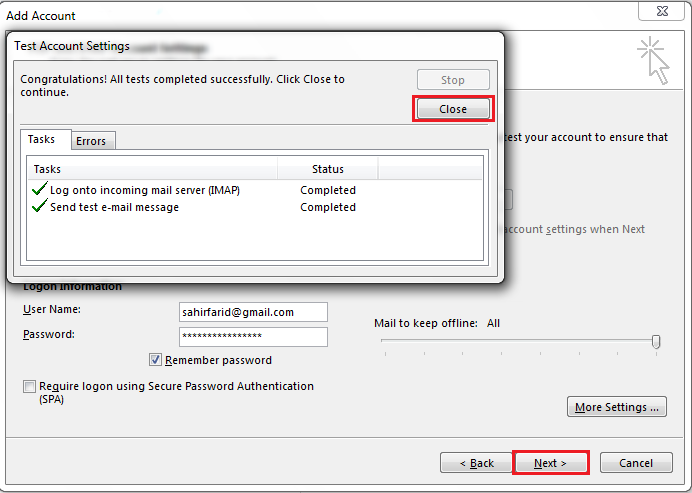
That’s all. If you don’t receive a test complete message then consider repeating the steps and make sure to do it correctly.