

It is quite useful to be able to check all your emails from single place. Gmail is the best email client for several reasons. Here is how to setup single Gmail Account to check emails from multiple domains.
You may have more than one email accounts if you are working with a company that has assigned you an official email ID or you are a blogger with multiple blogs, thus different email for each of your website. In such a situation, it may become irritating for you to log in every account separately or switch between accounts to check and send emails. So, email alias allows you to keep all your email accounts allied at a single Gmail account.
By following this article, you will be able to setup all your emails with Gmail, you can send email as the selected domain email. Plus you get all the spam filtering features of Gmail.
First, login to your Gmail account. Then click on ‘settings’ icon on the top-right corner of your mailbox. From the menu, open the settings by clicking on ‘Settings’ to open the main settings windows.
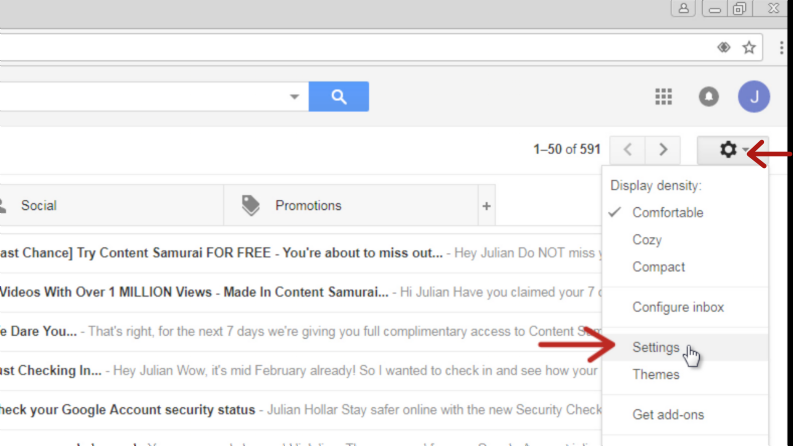
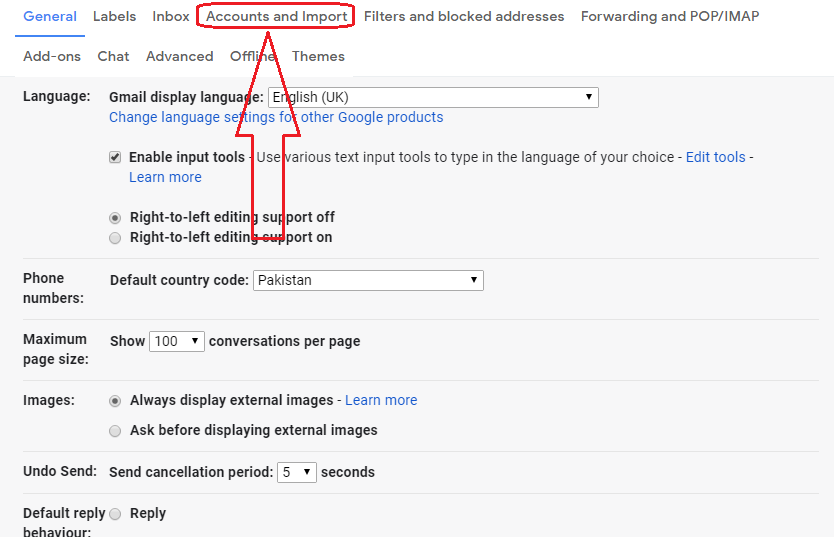
Now from multiple options, click on ‘Accounts and Import’.
Now, click on ‘Add an email address’ to add your new alias.
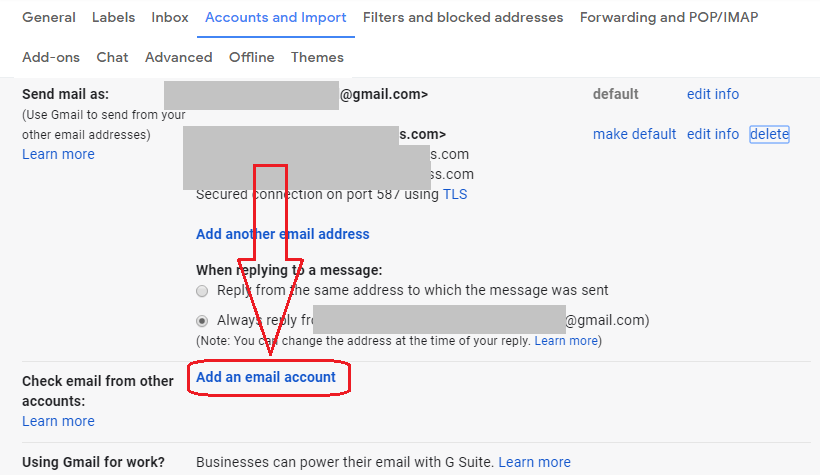
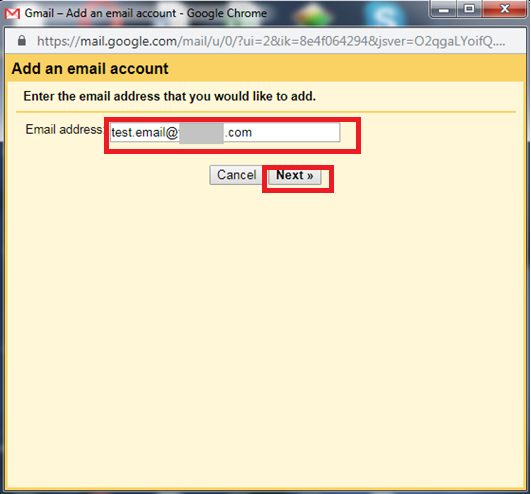
Once you click on “Add an email account”, a popup window will open asking for the new email address that you want to add into your Gmail account. Enter your email address and click on Next.
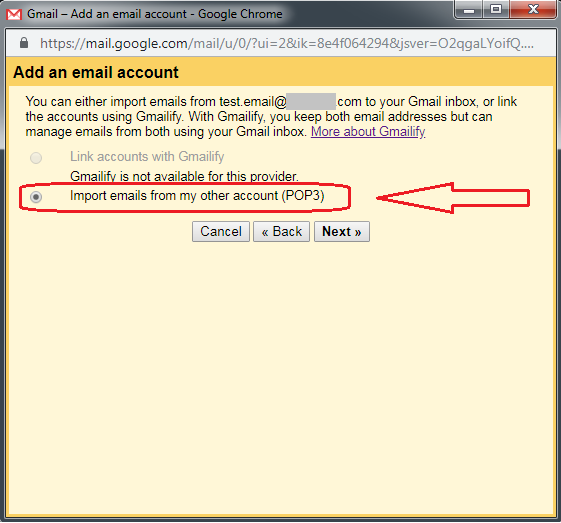
You will get 2 options. Select “Import emails from my other account (POP3)” and click next.
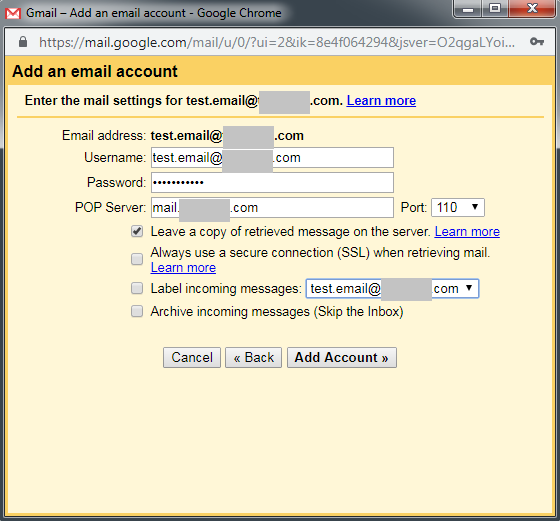
This part may seem a bit tricky as you have to enter the username, password, POP Server, and need to look after a bunch of other options. But don’t worry; just follow below steps to complete this part.
- Username – It’s your full email address, in most of the cases, or you may need to ask your email service provider.
- Password – The password of the other account you want to add.
- POP Server – It is the Post Office Protocol Server and usually is like mail.domain.com, but your email service provider may have a different POP Server, so you may need to confirm it.
- Leave a copy of retrieved message on the server – Select this check box so none of the emails get deleted from the original server. (Recommended)
- Always use a secure connection (SSL) when retrieving mail – You can select or leave this check box according to your original server settings. Keeping this option checked is good mostly.
- Label incoming messages – Select the check box if you want to label incoming messages.
- Archive incoming messages (Skip the Inbox) – To send the incoming messages directly to the archive folder.
After entering all the credentials and desired options, click “Add Account”.
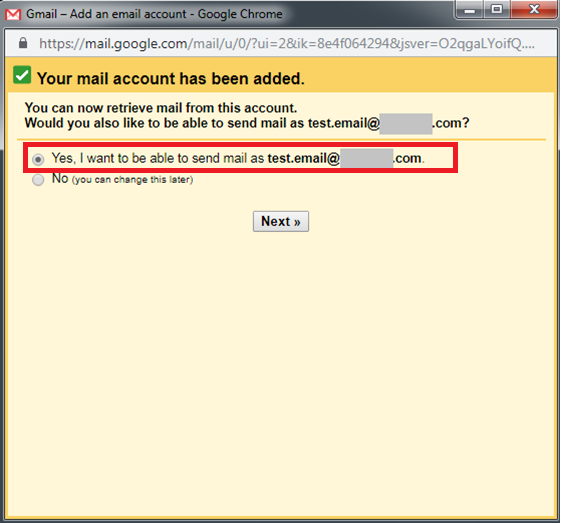
Now that your account is added successfully to your Gmail account, it will ask you whether you want to be able to send mail as test.email@*.com (The account we have added) or not. We’d suggest you select YES so you’ll have the ability to receive and send your emails here.
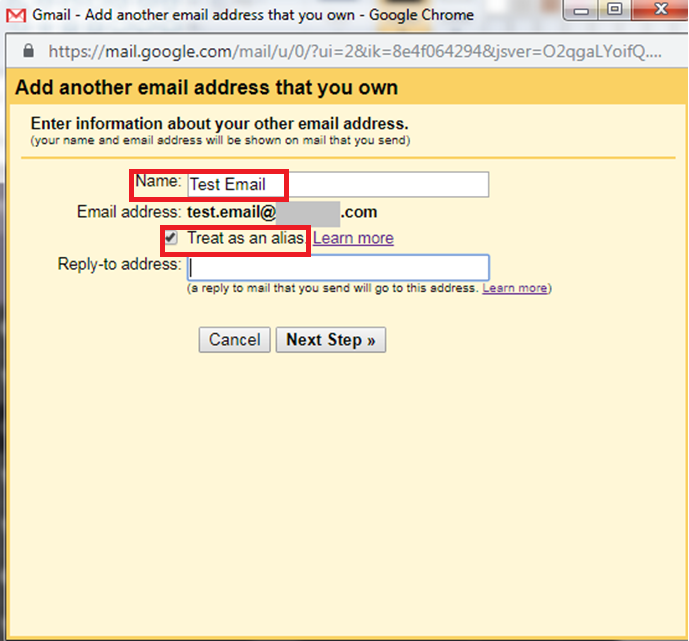
Now give a Name for the new account and check the “Treat as an alias” option, as you are adding the new email account as an alias.
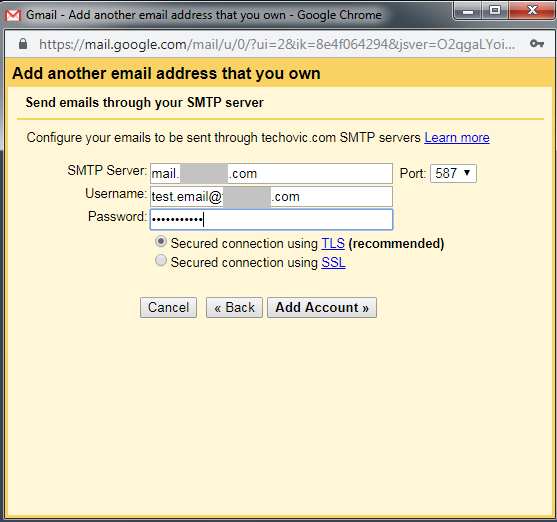
Now, you have to add SMTP Server settings to be able to send emails through this alias from your Gmail account. So, enter the following details.
- SMTP Server – It’s usually mail.yourdomain.com or you may need to ask your email service provider.
- Port – Select “587”
- Username – Your full email address which you want to add.
- Password – The password of the same account
After entering all the required information, select “Secured connection using TLS” and click on “Add Account”.
In this final step, you’ll be asked to confirm verification of the email address. You’ll receive an email from Gmail to the other email ID, and you can easily verify it by clicking on the link in the confirmation email or by entering the confirmation code received in the email.

And that’s all! To test the success of process send a mail to you alias email, and check if the email is received or not. By following the same steps, you can add multiple email accounts to your single Gmail account.
Then you have to check your emails only from one account.