Gmail add-ons perform some tasks for you like downloading attachments from multiple emails or removing duplicate entries from a Google Sheet.
While running email campaigns and sending them to your potential customers, you often need to track how they are dealing with your emails. Have they opened the email or just ignored it?
Keeping your email tracking needs in mind, several email open tracking add-ons are introduced to help you track email open in Gmail.
How does email open tracking work?
The most common method of tracking is, when you send an email through a specific email tracking service, a small graphic is attached to the bottom of your email. Therefore, when the recipient opens the email, that graphic file automatically downloads to his device from the tracking service provider’s server, and you are notified about the email delivery.
Top Email Tracking Add-ones for Gmail
There are several email tracking add-ons and extensions available for Gmail. Some of the best add-ons are
- Mailtrack
- Email Tracker
- SalesHandy (Works both with Gmail and Outlook)
- Bananatag Email Tracking
Now let’s try an add-on to track the email.
Let us learn how to track open emails in Gmail using add-ons. We will use the Mailtrack extension to track email.
Note: Before moving to the first step, make sure you are logged into your Gmail account so you do not need to perform extra steps.
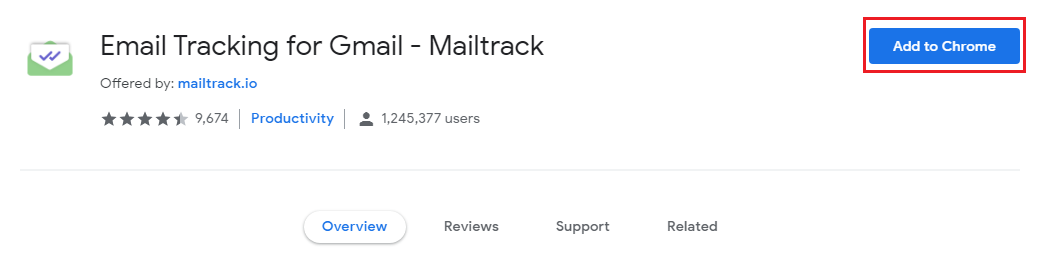
Click this link to get to the installation page of Mailtrack. On this page, click on the “Add to Chrome” button to install this extension in your browser
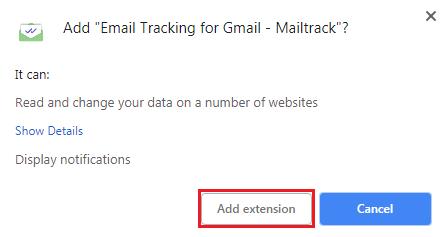
A small popup message will appear asking for confirmation. Click “Add extension” to proceed.
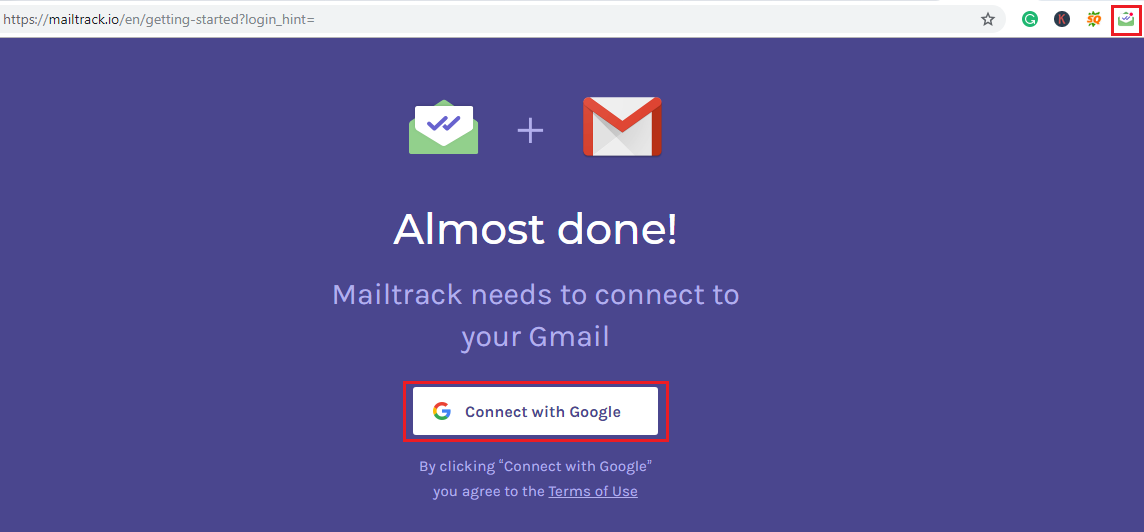
After processing for a while, the Mailtrack extension will be added to your browser. A small icon will appear on the top-right corner of your browser and a page will open asking your permission to connect the extension with Google. Click on “Connect with Google”.
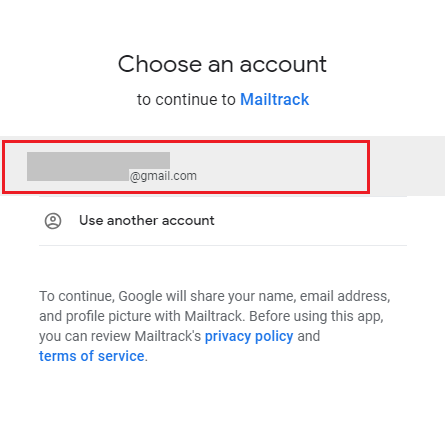
Now, select the desired Google account from the menu or add a new one.
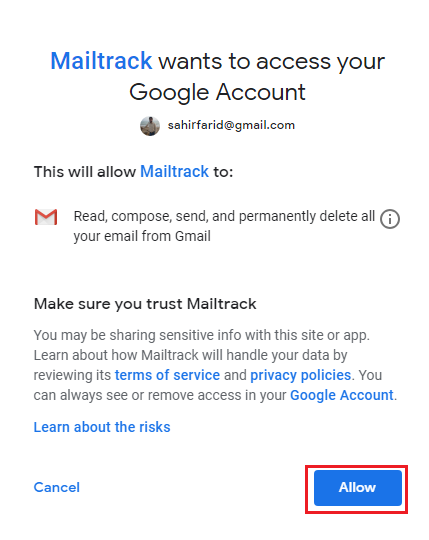
On the next page, you will be asked for permission to access your account. Click on Allow to complete the installation process.
The installation is completed. On the next page, you have to choose your desired plan. We’ll select a free plan for now. You may choose one according to your requirements. Email tracking is free in all the plans.

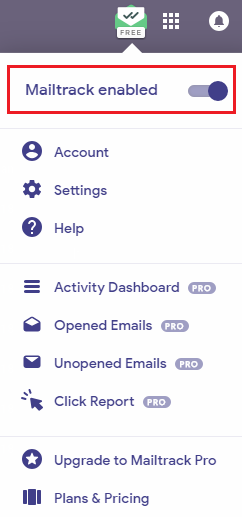
Now, move to your Gmail account. There you will see a Mailtracker icon on the top-right corner of the page. Click on it to verify whether Mailtracker is enabled or not.
Now we’ll send an email and track it.
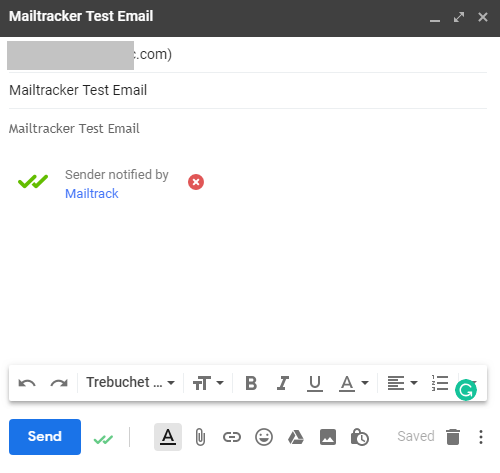
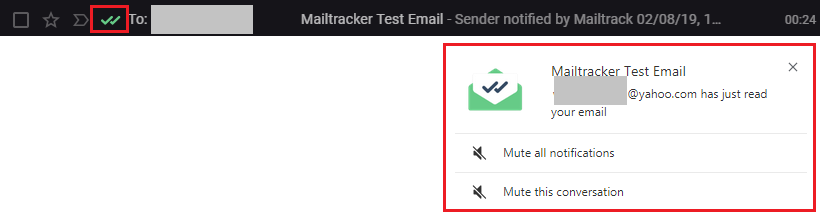
For confirmation, move to your “Sent” email folder. There you will see 2 tick signs.
In the screenshot below you can see one tick sign is green while the other is grey indicating that email is not read.

Once the email is read, you’ll receive a popup notification and both the ticks will become green. You’ll also receive a confirmation email.